How to install Magento 2.4.4 in Ubuntu 20.04
Important points:
- This is a clean installation of Ubuntu 20.04 (No Plesk, No cPanel installed)
- It is not possible to run Magento without Elastic search anymore.
- It is not possible to use PHP 7.1 or PHP 7.2 with the Magento 2.4.4
- You can install Magento 2.4.0 with PHP 7.3, but it is not tested or recommended.
Software Versions we are using:
- Web Server - Apache 2.4.46
- PHP - 7.4.3
- Database Server - MySQL 8.0.23-0ubuntu0.20.04.1
- Elasticsearch 7.10
- Composer 2.0.9
- JDK 1.8
System information:
- Operating System: Ubuntu 20.04.2 LTS
- Kernel: 5.4.0-65-generic x86_64 x86_64 GNU/Linux
- System Spec:
- CPU:2 vCore
- RAM:4 GB
- SSD:80 GB
Errata from author
This is the minimal install build, for testing or development purposes. Guide expects that you know basics of text editing and running MySQL queries in command line, PHPmyAdmin can be installed and configured separately, however this is not covered by the scope of this guide. SSL certificate should be also implemented, this can be done via LetsEncrypt, yet again it is not covered in the scope of this guide. Domain name should be attached and configured, yet again this is not within the scope of this guide.
The Process:
Magento Account
Please create the account on https://marketplace.magento.com/ website, once account is activated, you need to obtain the access keys.

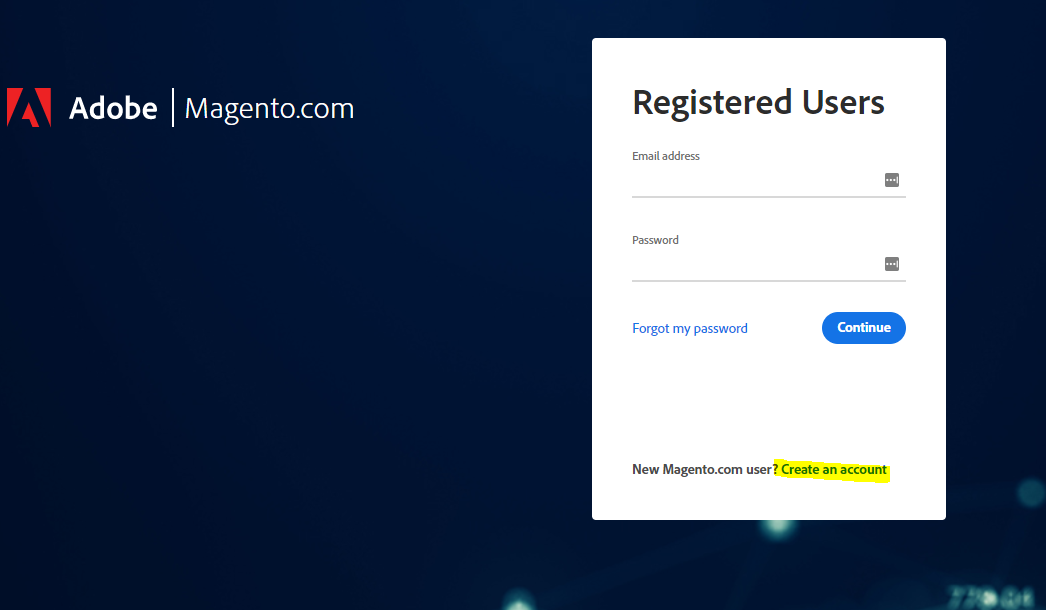
Create new account:
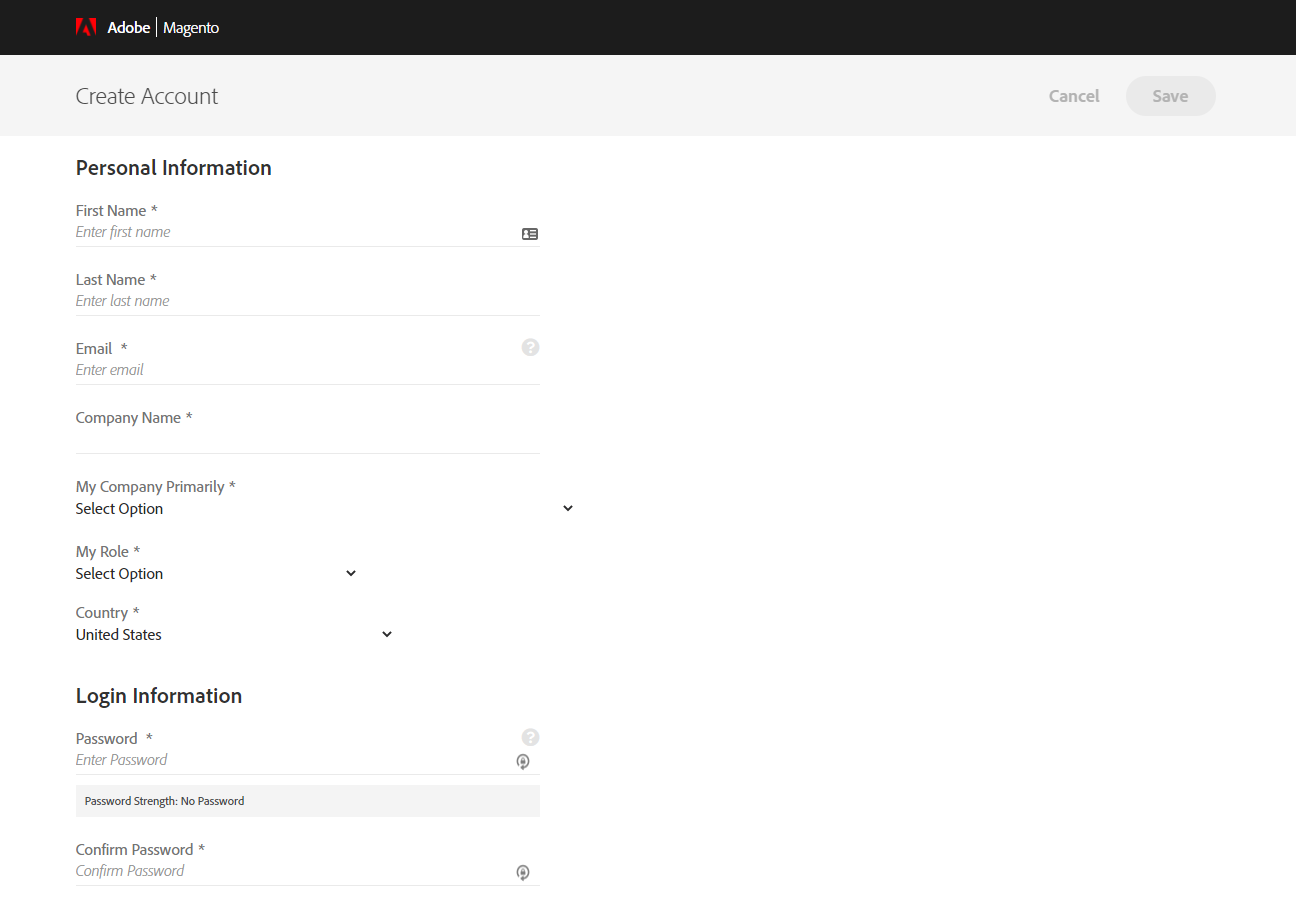
Next, you will have a short form to be filled:
Make sure that you activate the account by following the instructions in the email, which have been sent to your mailbox registered with the account:

Now you should be logged in to your account:
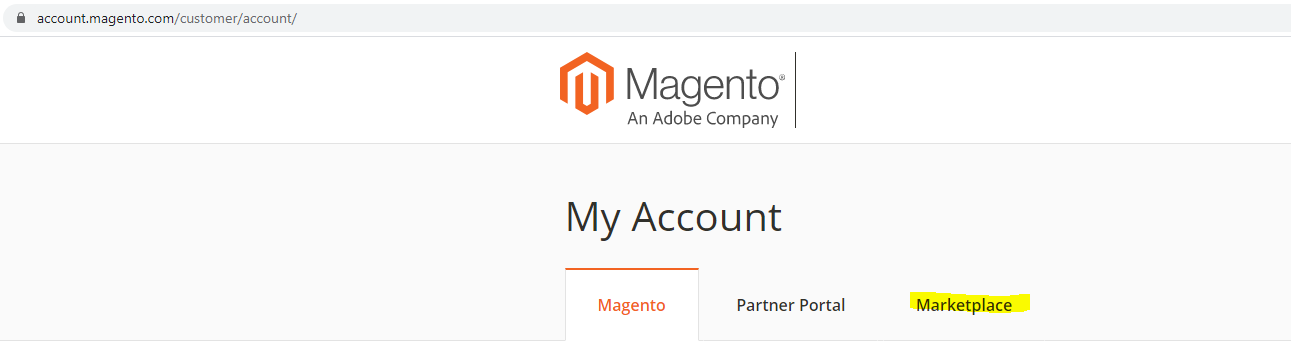
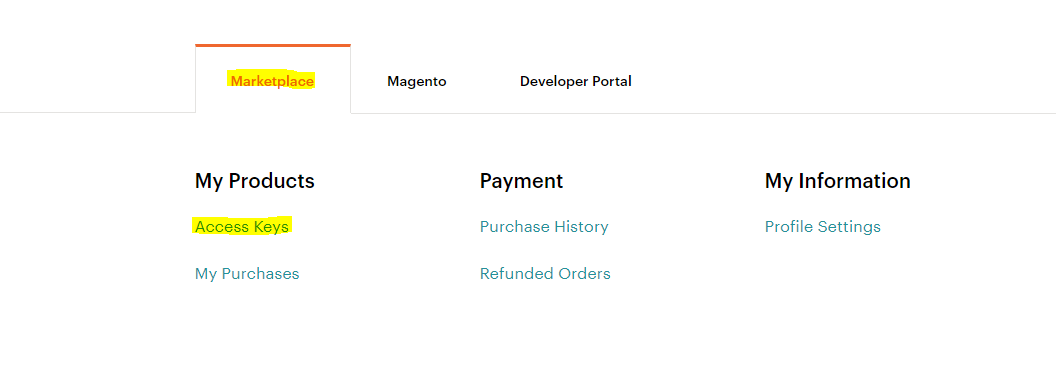
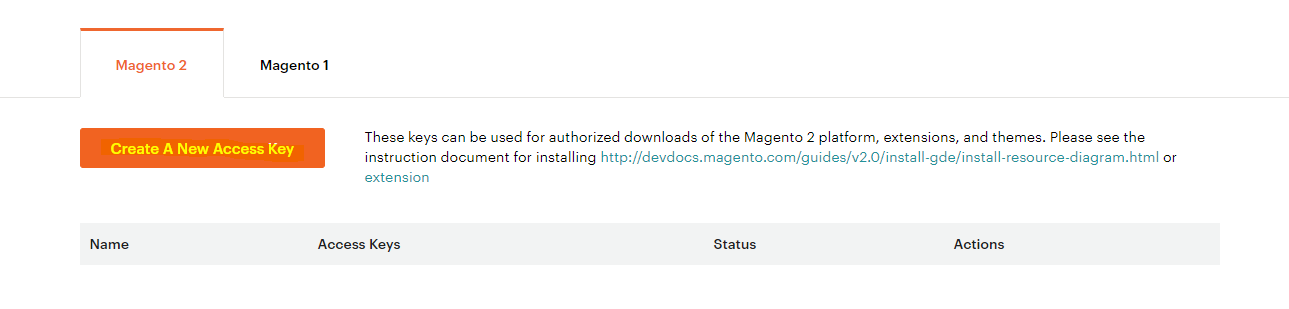
Once account is ready to be used, login to it and click on My profile in the top right corner, then Marketplace then My products finally on to Access Keys.

Click on the Access Keys:
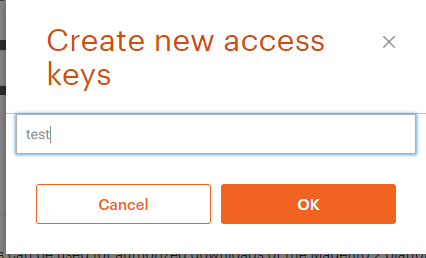
Create a new access key:
Give your key a meaningful name, and have it ready for the composer installation step.
When asked for credentials in composer, below table explains what goes where:

| Magento Website | Composer credentials |
|---|---|
| Public Key | Username |
| Private Key | Password |
Further documentation on the matter is available below: Obtain authentication keys for the Magento code repository.
Web Server and PHP installation and configuration
apt-get update && apt-get upgrade -y
Next, we need to get the package required for the additional PPA to work
apt-get install software-properties-common -y
To get the PHP 7.4 we need to add the below repository, you will be asked if you definitely want to add this repository, press Enter to confirm:
add-apt-repository ppa:ondrej/apache2
If you wish to learn more about the repository in question.
With the new PPA added, lets update and upgrade packages
apt-get update && apt-get upgrade -y
To install the web server called Apache2
apt-get install apache2 -y
Enable apache to start at system boot (enable it)
systemctl enable apache2.service
Start apache
systemctl start apache2.service
Check the installed version with the command below
root@localhost:/# apache2 -v
You should get the output similar to the following:
Server version: Apache/2.4.46 (Ubuntu)
Server built: 2020-08-10T12:32:13
Now lets install PHP modules required for Magento
apt-get install php7.4 libapache2-mod-php7.4 php7.4-common php7.4-gmp php7.4-curl php7.4-soap php7.4-bcmath php7.4-intl php7.4-
mbstring php7.4-xmlrpc php7.4-mysql php7.4-gd php7.4-xml php7.4-cli php7.4-zip unzip -y
Lets test the PHP to see if we have version 7.4.3 enabled
root@localhost:/# php -v
You should get the response similar to:
PHP 7.4.3 (cli) (built: Oct 6 2020 15:47:56) ( NTS )
Copyright (c) The PHP Group
Zend Engine v3.4.0, Copyright (c) Zend Technologies
with Zend OPcache v7.4.3, Copyright (c), by Zend Technologies
Next, we need to configure the apache with the PHP we just enabled
a2enmod php7.4
Then we need to enable mod rewrite
a2enmod rewrite
To see the changes in the configuration, restart apache again
systemctl restart apache2
Fine tuning the PHP settings
Documentation regarding PHP fine tuning is available. Before we edit the configuration file, lets back it up to the root directory.
cp /etc/php/7.4/apache2/php.ini /root/php.ini
To edit the php.ini file in vi:
vi /etc/php/7.4/apache2/php.ini
Adjust the directives to the following values:
file_uploads = On
allow_url_fopen = On
short_open_tag = On
memory_limit = 256M
upload_max_filesize = 100M
max_execution_time = 360
To apply the changes, restart the apache2
systemctl restart apache2
Database server installation and configuration
Magento requires specific version of database server to be running on the server. Lets install the MySQL server:
apt-get install mysql-server -y
Next, we need to apply some basic security with the script below:
mysql_secure_installation
Then, we want MySQL auto start at boot:
systemctl enable mysql
Then, we start the MySQL with:
systemctl start mysql
Next, we need to grab pen and paper or a text document, where we will take a note of the connection details for our magento installation: We need to decide on the following:
| MySQL directive: | MySQL value: |
|---|---|
| MySQL Username | magentouser |
| Password | replacemewithactualpassword |
| Database name | magentodatabase |
With the information above to hand, we need to login to the MySQL server via the command below (press enter and paste or type in the root password):
mysql -u root -p
Then, we need to create a new database:
create database magentodatabase;
Next we create the user for the database:
CREATE USER 'magentouser'@'localhost' IDENTIFIED BY 'replacemewithactualpassword';
Now onto permissions:
GRANT ALL ON magentodatabase.* TO 'magentouser'@'localhost' WITH GRANT OPTION;
Apply the changes:
flush privileges;
Now we can leave the mysql command prompt with control + C or by typing exit; like below:
exit;
Java
Before we install elasticsearch, we need to make sure that Java is installed.
apt-get install openjdk-8-jdk -y
Elasticsearch
Next piece of the puzzle we need to fit in is the elastic search. By default, the repository is not added to the system, we need to add it first. For security reasons, if you already do not have it, install the below package to provide the encryption for for the apt-transport.
apt-get install apt-transport-https
Next, we need to add the GPG key provided by elastic to our system:
curl -fsSL https://artifacts.elastic.co/GPG-KEY-elasticsearch | sudo apt-key add -
With the key in place, we add the stable 7.x repository of elastic to our system:
echo "deb https://artifacts.elastic.co/packages/7.x/apt stable main" | sudo tee -a /etc/apt/sources.list.d/elastic-7.x.list
At this point we need to refresh our local packages:
apt-get update -y
Now we are ready to install the elasticsearch:
apt-get install elasticsearch -y
Elasticsearch is provided as a service (deamon) for the system, therefore it needs to be enabled at boot and started initially. Start the service:
systemctl start elasticsearch
Enable the service:
systemctl enable elasticsearch
It may be wise to up the virtual memory setting as per documentation linked here, this is per system adjustment: If command is run correctly it should return the name of the directive and the value as below:
sysctl -w vm.max_map_count=262144
vm.max_map_count = 262144
To apply the change restart elasticsearch:
systemctl restart elasticsearch
Securing elasticsearch is not covered in the scope of this guide, further information on the matter is available. To test elasticsearch locally:
curl -XGET 'localhost:9200/_cat/health?v&pretty'
epoch timestamp cluster status node.total node.data shards pri relo init unassign pending_tasks max_task_wait_time
active_shards_percent
1613999304 13:08:24 elasticsearch green 1 1 0 0 0 0 0 0 - 100.0%
Composer
With project of this scope a dependency Manager for the PHP is a must. Composer should be installed as per documentation. https://getcomposer.org/download/ If you are new to the composer, have a look at the quick intro to the tool. This is the tool which will simplify the installation of the Magento. Move to the /tmp directory with:
cd /tmp
run this command to download the composer setup file
php -r "copy('
https://getcomposer.org/installer
', 'composer-setup.php');"
and install it with the command below:
php composer-setup.php --install-dir=/usr/local/bin --filename=composer
Next, test it with composer –version command:
composer --version
Do not run Composer as root/super user! See https://getcomposer.org/root for details
Continue as root/super user [yes]? yes
Composer version 2.0.9 2021-01-27 16:09:27
Additional local user for Magento
Magento requires additional user to be created and configured, this user should be added to sudo group. First, lets make sure that sudo is installed on your system,
apt-get install sudo -y
Then we need to create the user, it does not have to be called magento, it is your unique name you will remember and use to install and reconfigure the Magento in the future. This user will also own the web space files. Make sure to secure the user account with the strong password.
adduser magento
To change the password for the user:
passwd magento
To add the user to the sudo group:
usermod -aG sudo magento
Now, we need to decide on path where magento will live, make sure that partition is having enough space for your current and future requirements, I will go with home directory of magento user:
cd /home/magento/
Then we need to change the user from root to magento (or your named sudo user)
su magento
And as the magento user we attempt to install Magento:
composer create-project --repository=https://repo.magento.com/ magento/project-community-edition magento2
Command will ask you for the magento access keys and if you wish to store these credentials.
magento@localhost:~$ composer create-project --repository= https://repo.magento.com/ magento/project-community-edition magento2
Creating a "magento/project-community-edition" project at "./magento2"
Warning from repo.magento.com: You haven't provided your Magento authentication keys. For instructions, visit https://devdocs.magento.
com/guides/v2.3/install-gde/prereq/connect-auth.html
Authentication required (repo.magento.com):
Username: 76831b7673a3ccef771cb2c06d714d1b
Password:
Do you want to store credentials for repo.magento.com in /home/magento/.config/composer/auth.json ? [Yn] y
Installing magento/project-community-edition (2.4.2)
As there is no 'unzip' command installed zip files are being unpacked using the PHP zip extension.
This may cause invalid reports of corrupted archives. Besides, any UNIX permissions (e.g. executable) defined in the archives will be lost.
Installing 'unzip' may remediate them.
- Downloading magento/project-community-edition (2.4.2)
- Installing magento/project-community-edition (2.4.2): Extracting archive
Created project in /home/magento/magento2
Loading composer repositories with package information
Please take a note of your login details (Admin URL):
[SUCCESS]: Magento installation complete.
[SUCCESS]: Magento Admin URI: /admin_XXXXX
Nothing to import.
Now lets move on to the next step which is permissions and ownership.
Permissions and ownership of the webspace files:
Move to the root directory of the Magento installation (/home/magento/magento2/) and run the commands below to set the permissions for folders and files: 775 for directories and 664 for files, as below:
find var generated vendor pub/static pub/media app/etc
-type f -exec chmod u+w {} +
and
find var generated vendor pub/static pub/media app/etc
-type d -exec chmod u+w {} +
and
chmod u+x bin /magento
Magento installation configuration
Next, we need to configure magento. Again we need a table to keep our details together, these must be matching with the details we have put earlier on in the MySQL section:
| Directive | Value | Already Defined? |
|---|---|---|
| –base-url | URL | to be defined |
| –db-host | localhost | likely to remain as localhost (unless your database is separate to your webspace |
| –db-name | magentodatabase | replace with your database name from the MySQL step |
| –db-user | magentouser | replace with your username from the MySQL step |
| –db-password | replace with the password from the MySQL step | |
| –admin-firstname | admin | replace with your first name |
| –admin-lastname | admin | replace with your last name |
| –admin-user | admin | Define your administrator username. Could be admin, administrator, daisy or anything you wish really. |
| –admin-password | admin123 | Replace with a strong password (admin123 is not a strong password) |
With details to hand we can run the below script from the root directory of the Magento installation directory:
bin/magento setup:install \
--base-url=http://mydomain.co.
uk \
--db-host=localhost \
--db-name=magentodatabase \
--db-user=magentouser \
--db-password
=replacemewiththeacutalpassword
\
--admin-firstname=admin \
--admin-lastname=admin \
[email protected] \
--admin-user=admin \
--admin-password=admin123 \
--language=en_US \
--currency=USD \
--timezone=America/Chicago \
--use-rewrites=1
Apache Virtual Host configuration
If you are logged as magento user, you can type in exit and you should become the root again, alternatively you can prepend each command with sudo command. We need to create a virtual host file, which will connect the domain with the web space. Process is outlined below: As root lets edit the apache default.conf file, I use vi, you can use vi or nano:
vi /etc/apache2/sites-enabled/000-default.conf
In this file, we adjust the below line to match our web space:
DocumentRoot /var/www/html
I adjust it to be:
DocumentRoot /home/magento/magento2
Next, the ServerName directive, update it to match your IP address
ServerName 11.22.33.44
Next, we need to adjust the environment variables to match our user, open the file below:
vi /etc/apache2/envvars
Find and adjust the line below to match your user: Before:
export
APACHE_RUN_USER=root
export
APACHE_RUN_GROUP=root
After: (provided that your magento user is simply called magento)
export
APACHE_RUN_USER=magento
export
APACHE_RUN_GROUP=magento
Next we edit the apache2.conf file
vi /etc/apache2/apache2.conf
Find the below block:
<Directory /var/www/>
Options Indexes FollowSymlinks
AllowOverride None
Require all granted
</Directory>
Adjust it to look like this:
<Directory /home/magento/magento2/>
Options FollowSymLinks
AllowOverride All
Require all granted
</Directory>
If you adjusted the path earlier, make sure that the Directory directive is matching your root directory of Magento. With all these changes saved, restart Apache:
systemctl restart apache2
We can now test the website in the browser, front page should be accessible. Disabling 2FA for the initial login Run the below command from the magento root directory:
bin/magento module:disable Magento_TwoFactorAuth
There should not be any cache at this point, however to be on the safe side:
bin/magento cache:flush
Spotted a mistake? Have a comment or suggestion? We'd love to hear from you. Please feel free to get in contact.
All information provided by Rootchronicles.com is without warranty. We take no responsibility for any loss, damage or any other misfortune resulting from following or attempting to follow guidance found on this site. If in doubt always seek professional consultation.